No-bias Technique for Stained Glass Quilts
Label Colors and Draw Arrows
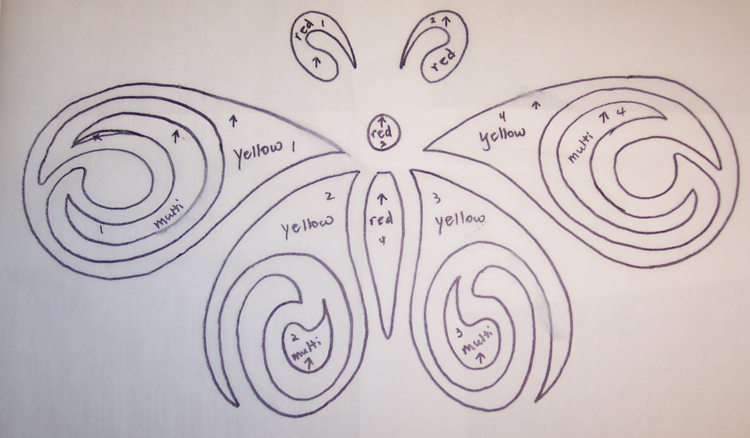
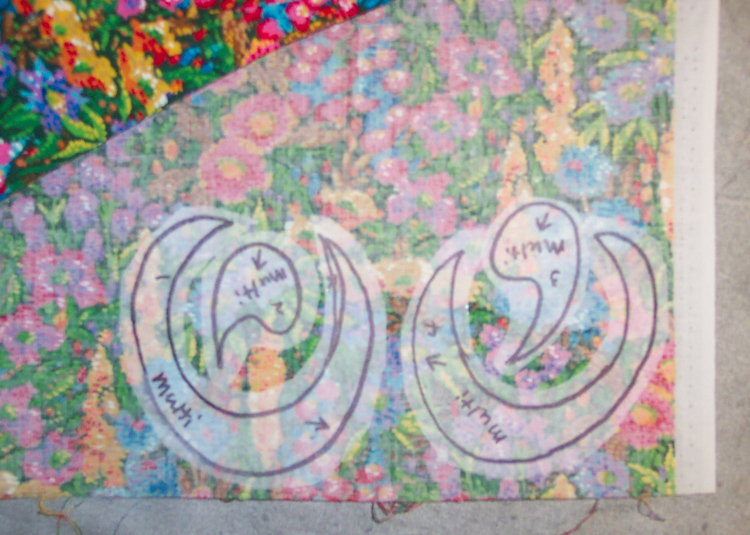
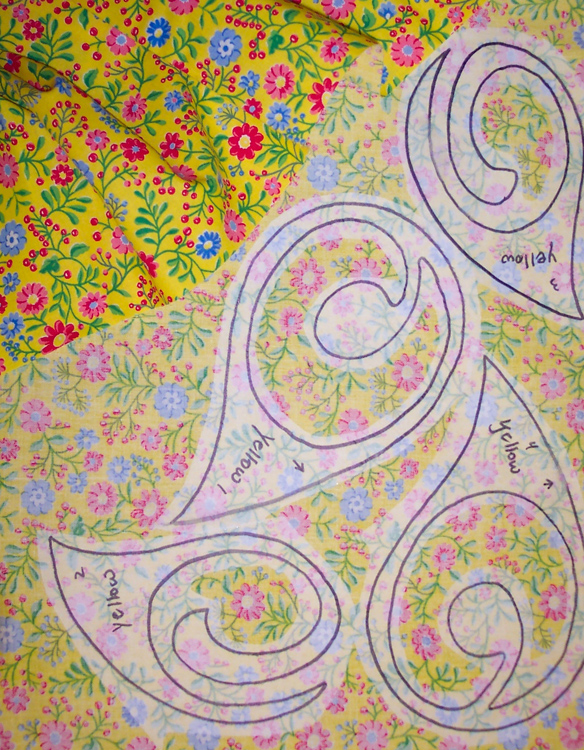
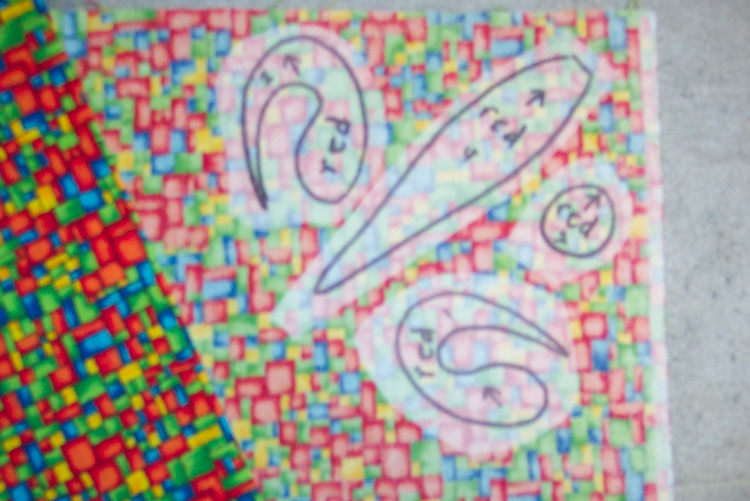
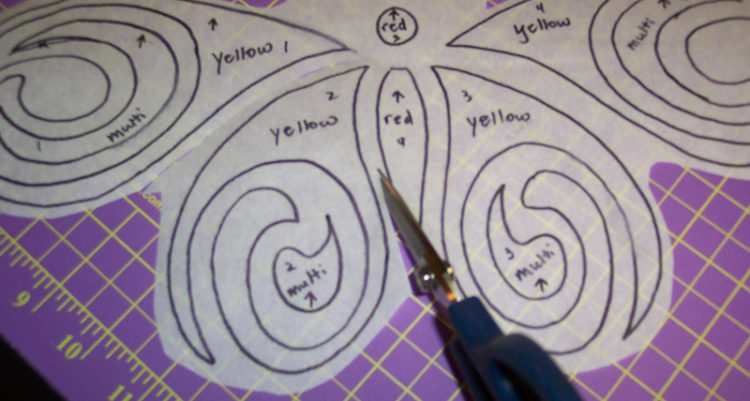
After that tracing is finished, write in the colors that you plan to make each piece.
Notice I have drawn an arrow on each section, and that arrow is pointing toward the TOP of the design. Those arrows will help you line everything up a little later on.
Also, I have labeled my red pieces, 1 through 4. Also, my yellow pieces are labeled 1 through 4. And the same is done with the “multi” pieces.
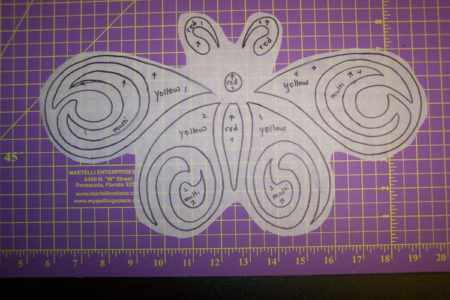
Once all of the sections have been labeled, go back to your original pattern and transfer all of those markings to it – the arrows, the color names, and the numbers.
To avoid fusing Wonder Under to fabric that you will not actually use, trim the excess away from the tracings.
Be sure to stay away from the tracing lines. You are just giving the Wonder Under a quick trim.
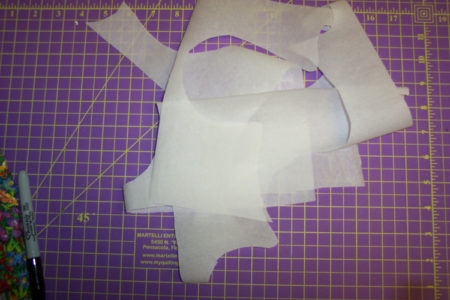
Your unused Wonder Under that got trimmed away may be put away and used for other projects, if you wish. I usually place my scraps of fusible in a box, and use them when I need to trace smaller sections of a project.
Using the tracing that has the color notations, cut BETWEEN the sections in order to separate them from each other.
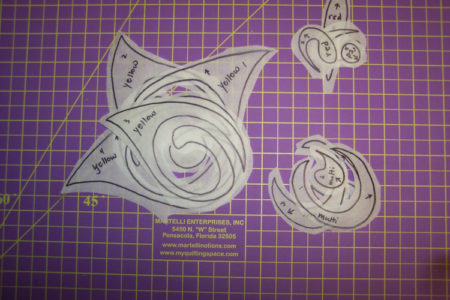
When all of the sections have been cut apart, divide the sections up and put them in stacks, according to the colors you plan to make them.
Place each stack on top of the fabric you plan to use for those sections.
About your iron…..
You are about to fuse your tracings to the fabrics. Be sure the STEAM is turned OFF, and your iron is on the COTTON setting. Let your iron sit for a few minutes after you turn it on, so that it will be completely heated up when you get ready to use it. I have found that many of my students think they need to hold the iron on the fabric for a count of 10, but it is really not necessary to let it stay in one place for that long.
Remember that you want the “glue” on the back of your fusible paper to transfer to the surface of your fabric. You do not want the fibers of the paper and the fibers of the fabric to be bonded together. When that happens, it is almost impossible to peel the paper backing off of the fabric when you need to.
Remember, as a general rule, “less is more” when it comes to fusing! With practice you will notice how the paper changes color after being fused to the fabrics, and you will only want to hold the iron on it until that change takes place. With that being said, if you start to take the paper backing off of your fabric, and the fibers of glue start to stretch from the fabric to the paper, then in that case, it needs a little more heat. Just return to your iron and give it a quick press. Let the paper cool before trying to remove it.
Look closely at this sample. Can you see how the fusible changes color when it is fused to the fabric?
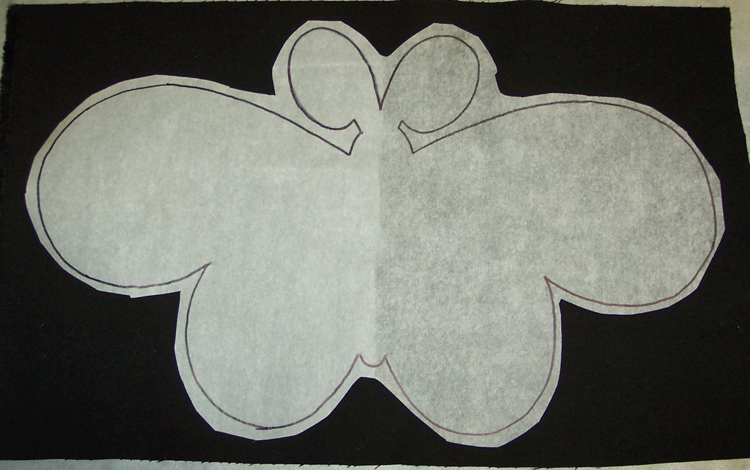 (The right side is fused! The left side is not.)
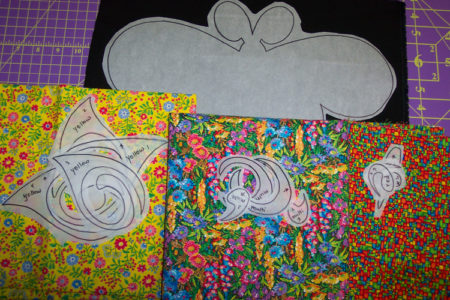
The silhouette tracing you did earlier will be fused to black fabric.
I use Kona Cotton for my black layer, and both sides are the same. IF, however, your chosen black fabric has a right or wrong side, be SURE you fuse the silhouette tracing on the WRONG side of the black!
Then your various other sections will be fused to the WRONG SIDE of your colored fabrics.
BE SURE YOU FUSE THEM TO THE WRONG SIDES ! ! ! ! ! ! ! ! !
In the following photos, I have turned the corners of the fabrics up so that you can see the difference in the sides.
NEVER fuse the tracings to the side of the fabric that you want to see in your finished project!